
DIY: Replacing Your Window Screens
Spring is still technically over a month away, but I’m already starting to feel the spring cleaning/home improvement urges sneaking in.
This weekend, I decided to tackle a project I’ve been putting off for years: replacing window screens.
Nothing about the project is particularly hard, I just didn’t want to do it. But after staring at ripped up screens day after day, I realized it was time. Now, I wish I had done it sooner!
6 Steps to Replacing Your Window Screens
I found this to be a great project for a beginner as it’s relatively easy and on the cheaper side (so, it’s OK if you mess up!).
Replacing your window screens essentially boils down to 6 steps:
- Remove screen from window (this is easier said than done, especially if the previous owner installed the frames upside down… )
- Remove old screen & spline (spline is the rubbery string in the frame’s grooves, though it can be made of metal)
- Lay screen on top & use spline roller to press screen into the grooves
- Press spline (firmly) into the grooves on top of the screen
- Remove excess screen using utility knife
- Replace in window
The below video provides a great overview of the process:
Now, you’ll notice he didn’t press the screen into the frame first, before adding the spline. Personally, I found this step to be essential in avoiding bubbles later. That’s why the below video was also extremely helpful:
I also watched several videos about removing the screens from the windows, but I had a difficult time finding my exact window set-up. Though, the big idea is to press against the side with the springs to compress them and then push out firmly, but gently so you don’t bend anything. I had a big fear of accidentally dropping the frames, so I started with my downstairs windows first to get practice.
Tools Required for Replacing Your Window Screens
For this project I replaced 7 windows using the following supplies:
- 1 roll of screen (I used Phifer’s 48 in x 25 ft silver gray standard screen)
- 4 bags of screen spline (I used Phifer’s .140 in dia. x 25 ft gray screen spline)
- Spline roller (I borrowed mine, but you can buy them for about $5)
- Flathead screwdriver
And that’s it!
In total for 7 windows, I spent just over $40 bucks.
Of course, the exact screen and screen spline you need will depend on your windows. I highly recommend taking samples of each with you (literally cut them off one of your windows) to the store as the options there can be a bit overwhelming.
The Results
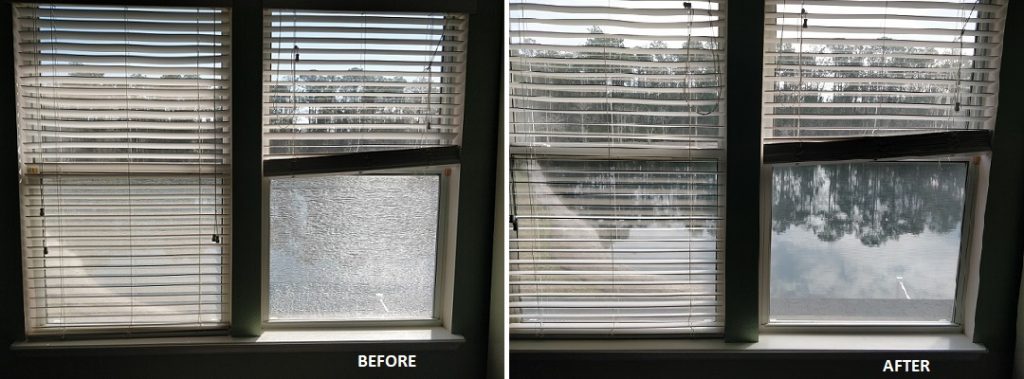
I wish I had done this sooner! For $40 bucks and a Saturday afternoon, my view of the outdoors has completely changed.
The before-and-after picture really says it all.
Have any other easy and affordable DIYs to share? Leave me a comment below!
Getting the urge to spring clean too? Check out my list of resources to get you inspired.